When it comes to home improvement, one of the most impactful projects you can undertake is the installation or maintenance of a driveway. A well-paved driveway not only adds curb appeal but also enhances functionality and value. If you're considering tackling this project yourself, you need to know various aspects of asphalt paving, from planning to execution. This comprehensive guide will cover everything you need to know about planning a DIY driveway project.
Table of Contents
- 1.1 What is Asphalt? 1.2 Benefits of Asphalt Driveways 1.3 Comparing Asphalt vs Concrete
- 2.1 Assessing Your Driveway Needs 2.2 Creating a Budget 2.3 Choosing the Right Materials
- 3.1 Essential Tools for Asphalt Installation 3.2 Safety Gear for DIY Projects
- 4.1 Site Assessment and Measurement 4.2 Clearing and Excavating the Area
- 5.1 Laying Down a Base Layer 5.2 Installing Hot Mix Asphalt 5.3 Compaction Techniques
- 6.1 Importance of Regular Maintenance 6.2 Common Repair Solutions 6.3 Sealcoating Your Driveway
- 7.1 When to Consider Parking Lot Paving 7.2 Parking Lot Striping Essentials
Understanding Asphalt Paving
What is Asphalt?
Asphalt is a composite material composed mainly of aggregates and bitumen, which acts as a binder when heated and compacted into place during installation processes like asphalt paving or resurfacing.
Benefits of Asphalt Driveways
Choosing an asphalt driveway over other materials offers several advantages:
- Cost-Effective: Generally cheaper than concrete. Flexibility: Better withstands temperature fluctuations without cracking. Speedy Installation: Can often be installed in less time compared to concrete. Low Maintenance: With proper maintenance, an asphalt driveway can last up to two decades.
Comparing Asphalt vs Concrete
| Feature | Asphalt | Concrete | |-----------------------|-----------------------------------|-------------------------------| | Cost | Generally lower | Higher initial investment | | Lifespan | Up to 20 years | Up to 30 years | | Repairability | Easier patching | More challenging repairs | | Temperature Resilience | Better for extreme climates | Prone to cracking in cold |
Planning Your Project
Assessing Your Driveway Needs
Before diving into your DIY driveway project, assess what your needs are:
- How much space do you have? Will it accommodate multiple vehicles? Do you need additional features like drainage?
Creating a Budget
Your budget will dictate many decisions throughout your project:
- Calculate costs for materials such as hot mix asphalt, gravel base layers, and sealants. Don’t forget labor if you plan on hiring help for specific tasks.
Choosing the Right Materials
The quality of materials used will directly affect the longevity and performance of your driveway:
- Look for high-quality asphalt from reputable asphalt companies. Consider durable aggregates that offer strength and stability.
Finding the Right Equipment
Essential Tools for Asphalt Installation
Invest in or rent critical equipment including:
- An asphalt paver or roller. Shovels and rakes for spreading material. A compactor for ensuring solid layering.
Safety Gear for DIY Projects
Safety should always come first:
- Wear gloves, goggles, and sturdy boots while working with heavy materials. Ensure proper ventilation if working with heated asphalt.
DIY Driveway Preparation
Site Assessment and Measurement
Measure your area thoroughly:
- Use stakes and strings to outline your desired driveway shape accurately.
Clearing and Excavating the Area
Remove existing materials carefully:
- Clear away any grass, debris, or old pavement using appropriate tools like excavators or manual labor.
Asphalt Driveway Installation Steps
Laying Down a Base Layer
A sturdy base layer is vital:
- Use crushed stone or gravel as a foundation before applying hot mix asphalt.
Installing Hot Mix Asphalt
This step requires precision:
- Spread heated asphalt evenly across your prepared base using rakes; aim for uniform thickness.
Compaction Techniques
Compacting ensures durability:
- Use vibratory rollers or compactors immediately after laying down asphalt.
Maintenance and Repair
Importance of Regular Maintenance
Regular upkeep extends the life of your asphalt driveway:
- Keep it free from debris, oil spills, and other damaging substances.
Common Repair Solutions
Be proactive with repairs:
- Learn techniques such as crack sealing or patching damaged areas promptly.
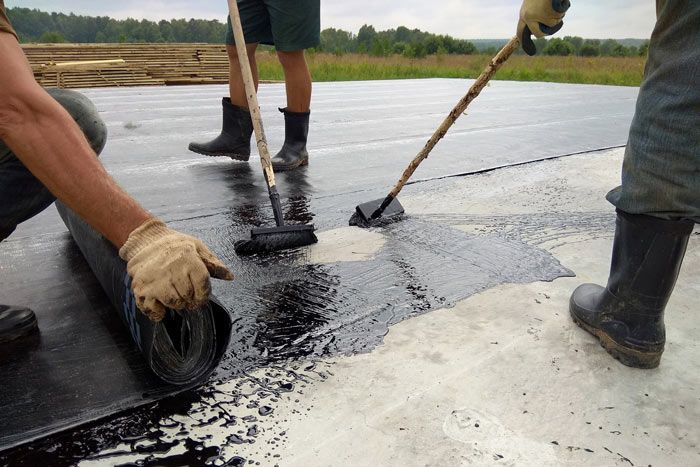
Sealcoating Your Driveway
Sealcoating protects your investment:
- This process creates a barrier against UV rays, oil spills, and moisture damage.
Parking Lot Considerations
When to Consider Parking Lot Paving?
If you're managing a commercial property or HOA:
- Evaluate whether current conditions are safe for both pedestrians and vehicles; if not, it may be time to consider parking lot paving services.
Parking Lot Striping Essentials
Proper line striping maintains order in parking lots:
- Hire professional parking lot striping services if necessary; they ensure compliance with ADA regulations as well as aesthetic guidelines.
FAQs
Q: How long does an asphalt driveway last?

Q: What factors influence asphalt paving cost?
A: Factors include size, thickness required, local labor rates, material costs per square foot—averaging between $3-$7 based on these variables.
Q: Is sealcoating necessary?
A: Yes! Sealcoating protects against weather elements which could lead to cracks or erosion over time.
Q: Can I install an asphalt driveway myself?
A: While it's possible with sufficient research and preparation, hiring professional asphalt paving contractors often guarantees better results due to expertise and equipment access.
Q: How often should I reseal my driveway?
A: Typically every two years; high traffic areas may require more frequent attention depending on wear patterns observed during inspections.
Q: What are common signs my driveway needs repair?
A: Look out for visible cracks forming within the surface; pooling water during rains indicates potential drainage issues too!
Conclusion: Making Your DIY Project a Success
In closing, planning a DIY driveway project involves numerous steps—from understanding different types of materials available through asphalt companies right down to executing installation techniques effectively while ensuring regular maintenance afterward! Whether opting for residential paving services or tackling it solo at home; remember that thorough research coupled with careful execution leads towards achieving impressive results that elevate both functionality & aesthetic appeal! So roll up those sleeves—your dream driveway awaits!
This article provides all-encompassing insights into planning a successful DIY drive way project while addressing key components such as budgeting costs related specifically towards various types associated with both residential & commercial applications alike!